Discover more delicious fermentation recipes similar to this one.
Fermentfulness.com
Your source for mindful fermentation recipes
Easy
Difficulty: Easy
Fermentation: 7d
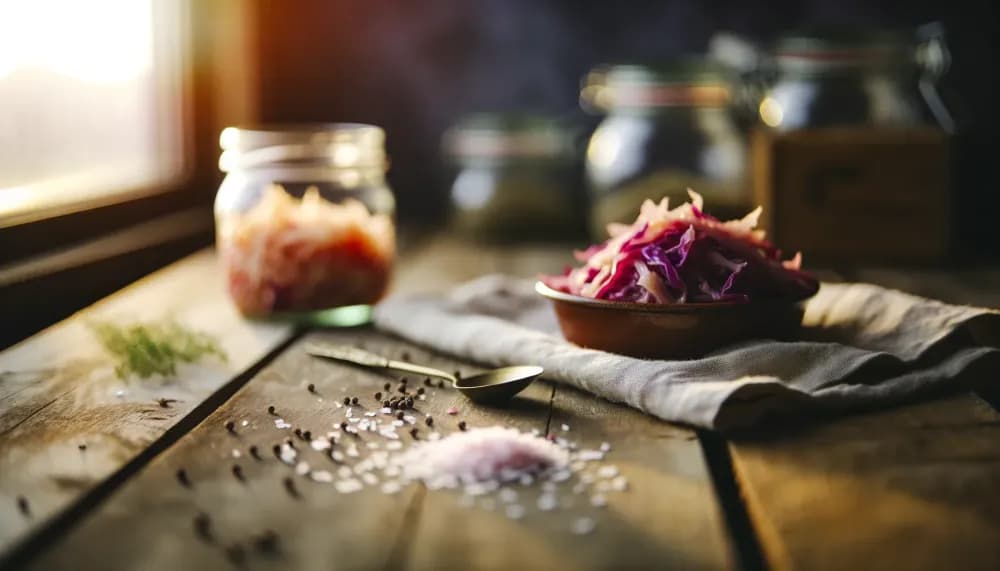
Traditional Lacto-Fermented Bread & Butter Pickles
Classic sweet-tangy pickles made with proper salt fermentation for maximum probiotic benefits. Ready in 7-14 days with authentic lactobacillus cultures.
How did it turn out?
Be the first to rate
O
Recipe by Ori Iscovici
Published
Make It Yours
Recipe by: Ori Iscovici
Published: 1/1/2026
Your fermentation journey0 / 28 items
Ingredients: 0/11Steps: 0/17
Recipe Overview
Total Time
Prep: 30m
Servings
8 people
Difficulty
Easy
Fermentation
7d
Dietary Information
Gluten-Free
Ingredients
ingredients0 / 11
2 pounds (900g) Pickling cucumbers, sliced 1/4-inch thick1 medium Yellow onion, thinly sliced4 cups (950ml) Filtered or non-chlorinated water3 tablespoons (54g) Fine sea salt or pickling salt (non-iodized)1/4 cup (50g sugar or 85g honey) Organic cane sugar or honey2 teaspoons Yellow mustard seeds1 teaspoon Celery seeds1/2 teaspoon Ground turmeric1/4 teaspoon Red pepper flakes (optional)3-4 sprigs Fresh dill sprigs2-3 leaves Grape leaves, horseradish leaves, or oak leaves (optional)
Instructions
Enjoy the process
steps0 / 17
Understanding This Recipe
This is a true lacto-fermented pickle that relies on naturally occurring lactobacillus bacteria and proper salt concentration (3%) to safely preserve and create probiotic-rich pickles. Unlike quick vinegar pickles, this method takes 7-14 days but develops complex flavors and genuine gut-health benefits. The process is forgiving and perfect for beginners—you'll learn to trust the fermentation process.
Preparing Your Workspace
Before you begin, clean all equipment thoroughly with hot soapy water. Rinse well to remove any soap residue. You don't need to sterilize—we want to preserve the good bacteria on the cucumber skins—but everything should be clean.
Prepare the salt brine: In a large measuring cup or bowl, combine 4 cups filtered water with 3 tablespoons sea salt. Stir vigorously until the salt is completely dissolved. This creates a 3% brine—the ideal concentration for safe lacto-fermentation that prevents harmful bacteria while encouraging beneficial lactobacillus.
2
Add the sweetener and spices: Stir in the sugar or honey, mustard seeds, celery seeds, turmeric, and red pepper flakes (if using) until the sweetener dissolves. The brine will turn golden from the turmeric. Note: The sweetness will mellow during fermentation as bacteria consume some of the sugars.
3
Cool completely: If you heated the water to dissolve ingredients, let the brine cool to room temperature (68-75°F/20-24°C) before proceeding. Hot brine will kill the beneficial bacteria we need.
Preparing the Vegetables
4
Slice the cucumbers: Wash cucumbers and trim off the blossom ends (the end opposite the stem). The blossom end contains enzymes that can make pickles soft. Slice into 1/4-inch rounds for classic bread and butter style.
5
Slice the onion: Peel and thinly slice the onion into half-moons. The onion adds sweetness and traditional bread and butter flavor.
6
Layer in the jar: If using grape leaves or other tannin-rich leaves, place one at the bottom of your jar. Begin layering cucumber slices and onion rings, tucking in dill sprigs as you go. Pack firmly but don't crush—you want the vegetables snug but not bruised.
Starting Fermentation
7
Pour the brine: Pour the prepared brine over the vegetables, ensuring they're completely submerged. Leave at least 1-2 inches of headspace at the top of the jar. This is crucial: vegetables exposed to air can develop mold.
8
Weight the vegetables: Place fermentation weights on top to keep everything submerged. If you don't have weights, a small glass jar filled with brine or a zip-top bag filled with extra brine works well. Top with a grape leaf if using.
9
Cover appropriately: Attach an airlock lid if you have one—this allows CO2 to escape while preventing oxygen from entering. If using a regular lid, keep it loose (just resting on top or screwed on only 1-2 turns) to allow gases to escape. Alternatively, cover with a clean kitchen towel secured with a rubber band.
10
Set in a safe spot: Place the jar on a plate or tray (to catch any overflow) in a location away from direct sunlight where the temperature stays between 68-75°F (20-24°C). Cooler temperatures slow fermentation; warmer speeds it up.
During Fermentation (Days 1-14)
11
Monitor daily: Check your pickles once a day. You should see bubbles forming within 24-48 hours—this is CO2 from active fermentation and means everything is working! The brine may become cloudy (this is normal and good). If any vegetables float above the brine, push them back down.
12
Burp if needed: If using a regular lid (not an airlock), "burp" the jar daily by briefly loosening the lid to release built-up CO2, then re-tighten loosely.
13
Taste test starting at day 7: After 7 days, the pickles are safe to eat and will have a mild tangy flavor. For maximum probiotic development and classic fermented flavor, continue fermenting for 10-14 days. Taste every couple days to find your preferred flavor intensity. The pickles will become more sour and less sweet as fermentation progresses.
14
Watch for proper signs: Good fermentation smells pleasantly sour and pickle-like. The brine becomes cloudy with beneficial bacteria. Small white spots on vegetables (kahm yeast) are harmless—just skim off. Warning signs: If you see pink, black, or fuzzy mold, or smell putrid/rotten odors, discard and start over. This is rare with proper salt concentration.
Finishing and Storage
15
When fermentation is complete: After 7-14 days (based on your taste preference), remove the weights and any grape leaves from the top. The pickles are now ready to eat!
16
Cold storage: Seal the jar with a regular lid (not an airlock) and transfer to the refrigerator. Cold temperatures dramatically slow fermentation, preserving your pickles at their current flavor level. They will continue to develop very slowly in the fridge.
17
Shelf life: Properly fermented pickles stored in the refrigerator will keep for 3-6 months or longer. The flavor will continue to mature slowly. Always use a clean utensil when removing pickles to prevent contamination.
Troubleshooting & Tips
Pickles are too salty: This mellows over time. Rinse individual pickles before eating if needed.
Pickles are too sour: You fermented too long for your taste. Next batch, refrigerate earlier. These are still perfectly safe and probiotic-rich.
Pickles are soft: Blossom ends weren't removed, or temperature was too warm. Try adding tannin-rich leaves next time.
No bubbling after 3 days: Temperature may be too cool. Move to a warmer spot (not above 80°F/27°C). Or your water contained chlorine that killed bacteria—use filtered water next time.
White film on top (kahm yeast): Harmless but can affect flavor. Skim off and ensure vegetables stay submerged. More common in warmer temperatures.
The Science of Safety
This recipe uses a 3% salt brine, which creates an environment where beneficial lactobacillus bacteria thrive while harmful bacteria cannot survive. Within the first few days, lactobacillus rapidly multiply and produce lactic acid, lowering the pH to 4.6 or below—the safe zone that prevents botulism and other pathogens. The 7-14 day fermentation time ensures adequate acid development and probiotic colonization. This is fundamentally different from quick vinegar pickles, which rely on added acid rather than fermentation for preservation.